LinuxONE
Overview
LinuxForHealth is deployable to amd64, s390x and arm64 (aarch64) platforms and may be built to support other chip architectures. These instructions explain how to bring up a LinuxONE VM from scratch and were tested with a VM from the IBM LinuxONE OSS Community Cloud. All steps are executed on the LinuxONE VM, with the exception of the initial steps to deploy the VM.
Prerequisites
An ssh utility such as OpenSSH must be installed on the computer you will use to connect to your LinuxONE VM.
Deploy a LinuxONE VM
These instructions explain how to deploy a new LinuxONE VM in the IBM LinuxONE OSS Community Cloud. If you already have a LinuxONE VM running Ubuntu 20.04, skip to the next section. If you do not have an account in the IBM LinuxONE OSS Community Cloud, you can start with Getting started with LinuxONE, where you can sign up for a free trial.
Create an ssh key pair to use to ssh into the VM you will create. Provide a file name when requested. In this case, we used
lfhcommvm1with no path, which creates the key pair in the current directory:cd ~/.ssh ssh-keygen -t rsa
Log into the IBM LinuxONE OSS Community Cloud and click “Manage Instances” in the “Service Catalog”.
Click “Create” and populate the fields. Choose “General Purpose VM”, provide a name for the VM, select the Ubuntu 20.04 image, select the LinuxONE flavor, and elect to import the public key (.pub) that you created in a previous step.
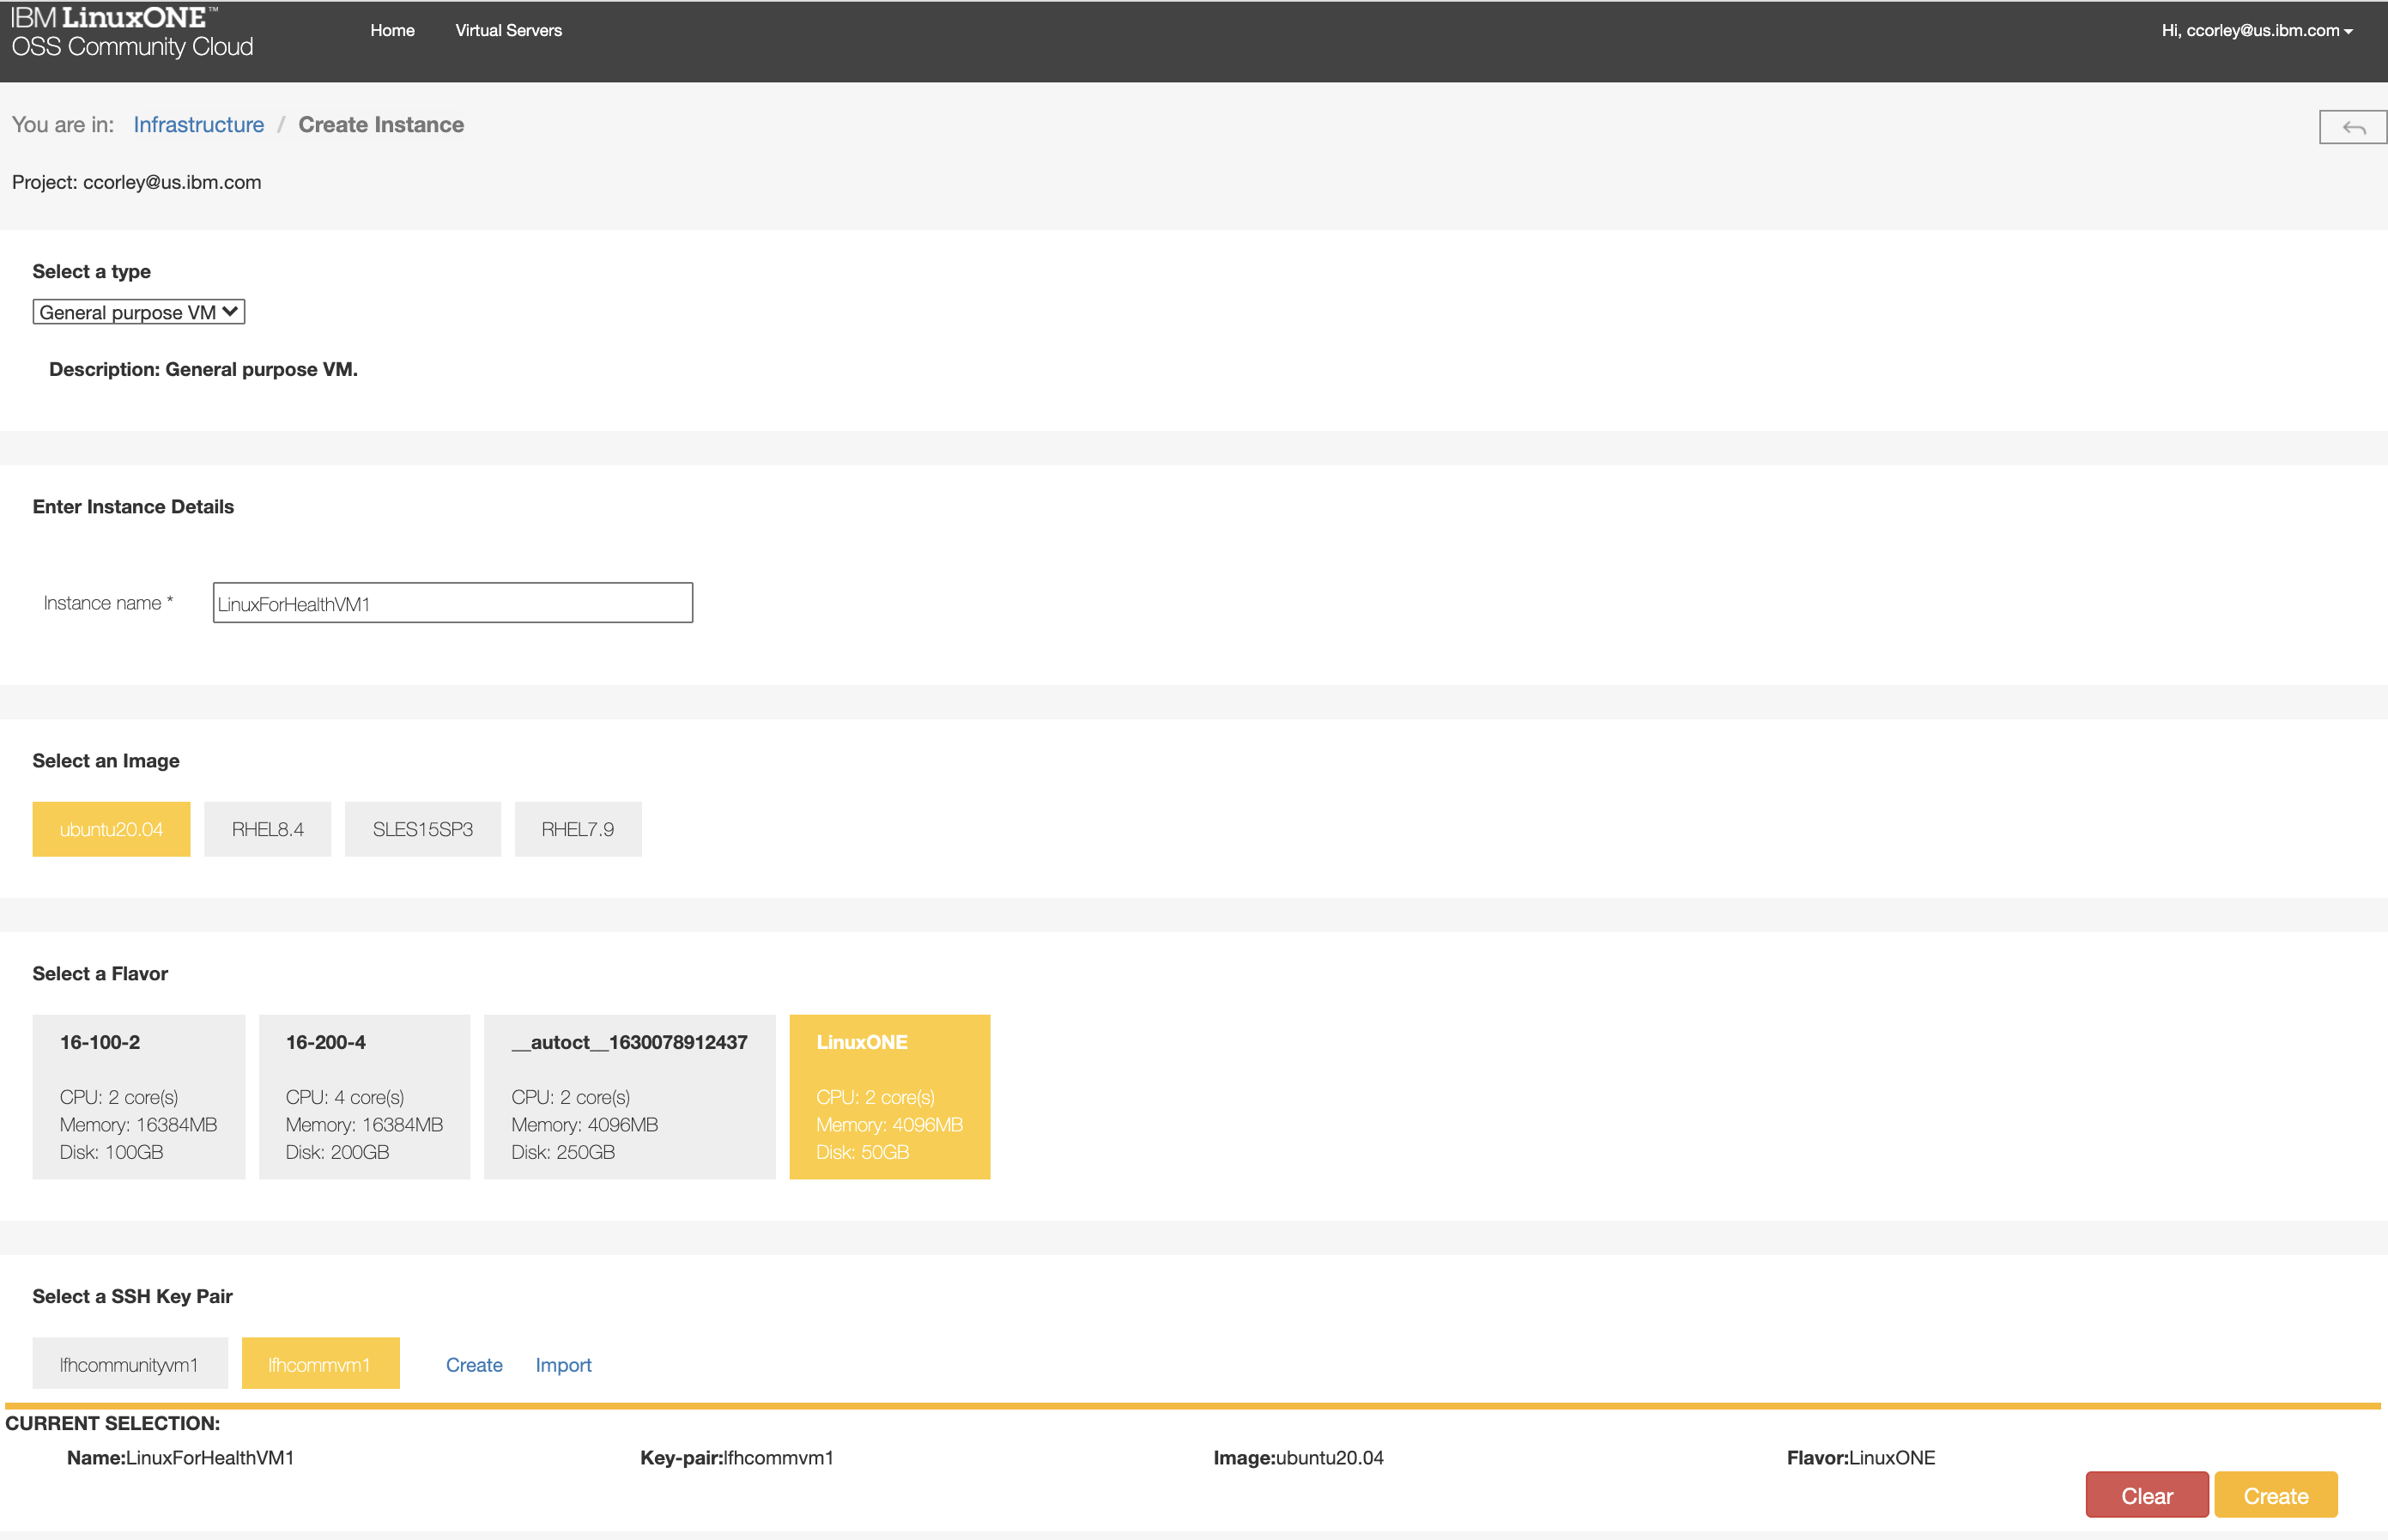
Click “Create” and wait a few minutes for your VM to start. Once started, note the IP address of your new VM.
Configure your computer to ssh into your new VM. For example, you can add this section to your OpenSSH .ssh/config file:
Host lfh-comm-vm1
   HostName <your VM's IP>
   User linux1
   IdentityFile ~/.ssh/lfhcommvm1
ssh into your LinuxONE VM:
ssh lfh-comm-vm1
Configure the Python Environment
On your LinuxONE VM, run the following commands to install python, pip and pipenv:
sudo apt-get update
sudo apt install python3-pip
pip install --upgrade pip
pip3 install pipenv
Add PATH=/home/linux1/.local/bin:$PATH to your ~/.bashrc file and run:
source .bashrc
Install Docker and docker-compose
Install docker and docker-compose via the following steps:
sudo snap install docker
sudo groupadd docker
sudo usermod -aG docker $USER
sudo snap start docker
Reboot for the user group changes to take effect:
sudo reboot
Build and Install librdkafka
Build and install librdkafka. Note that this step is necessary to make the correct version of librdkafka available on this platform:
git clone https://github.com/edenhill/librdkafka.git
cd librdkafka
./configure
make
sudo make install
sudo ldconfig
cd ..
Configure and Run LinuxForHealth connect
Clone and configure LinuxForHealth connect:
git clone https://github.com/LinuxForHealth/connect.git
cd connect
cp platforms/s390x/Dockerfile .
cp platforms/s390x/docker-compose.yml .
Create a virtual environment:
pipenv sync --dev
Bring up the LinuxForHealth services:
docker-compose up -d nats-server ipfs-node-0 zookeeper kafka ipfs-cluster-0
Start connect:
pipenv run connect
Send a Message to LinuxForHealth
Follow the Quickstart steps to send a message to LinuxForHealth. Be sure to use the IP of your VM in the OpenAPI /docs URL.